Adding Your Own Logo to Office 365 Navigation

How-To Customize Your Office 365 Navigation Bar

Daniel Gorski
Daniel Gorski 18. Januar 2022
1 Min. Lesezeit

Do you want to add your own logo into your Navigation Bar?

Office 365 Navigation Beispiel

Also in your Business Central Tenant:

BC Navigation Beispiel


Follow these 9 Steps

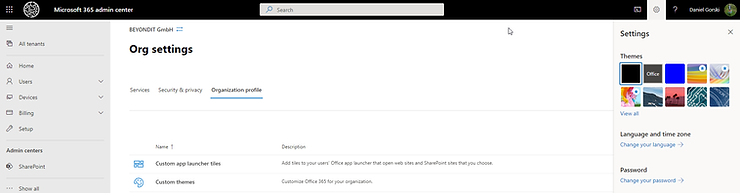
  1. Navigate to your Microsoft 365 Admin Center
  2. Jump into your Settings (if you don't see it, hit "Show all")
  3. Open Org. Settings
  4. Switch to Organization profile
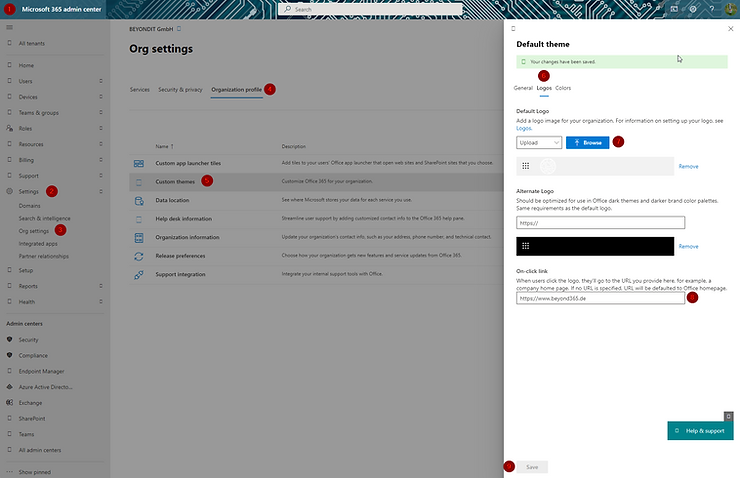
  5. Click on Custom Themes
  6. On the right hand, open Logos
  7. Upload a logo file (under 10 KB) or select a URL
  8. Save a link (if required) to redirect from the logo
  9. Save it! ✅

Einstellungen


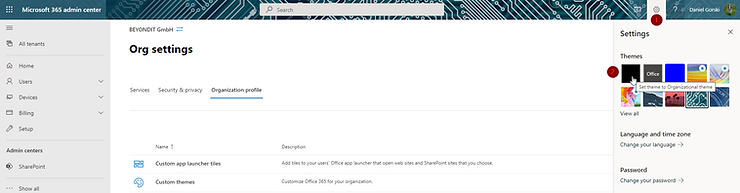
After that you need to set your theme to: "Organizational Theme"

Organizational Theme aktivieren


Have Fun! 😄

Finale Ansicht

beyondit
how-to
Office 365
Theme
Navigation Bar
Branding
How-To
Azure Communication Services SMTP with Scanner

Using Azure Communication Services SMTP with Your Scanner or Printer

Need to send scans via email from your office scanner? Azure Communication Services provides a reliable SMTP relay that works with any device supporting SMTP au

Read More
Read More
XRechnung Einrichtung in Business Central

XRechnung in Business Central einrichten: Schritt für Schritt zur E-Rechnung

Ab 2025 wird die E-Rechnung im B2B-Bereich in Deutschland Pflicht. Wir zeigen Ihnen, wie Sie XRechnung in Business Central einrichten – mit E-Beleg-Dienst, Work

Read More
Read More